Microsoft Clarity is an analytics tool to track and analyze user behavior across websites. It provides useful insights into how visitors interact with a website, enabling businesses to make data-driven decisions. The tool have features like heatmaps, session recordings that allow businesses to gain valuable insights into their website performance.
Clarity uses cookies to collect session data and also for other detection feature. It also offers a number of customization options such as masking sensitive content, turning on/off cookies, and adjusting the usage of cookies.
Here, in this article, we will show you how to install or set up Microsoft clarity on a WordPress website. So, let’s get started.
Why use Microsoft Clarity?
If you own a website, then you need to know about the visitors on the site. This new tool by Microsoft works as a partner for Google analytics, which can be linked together for better results. Once you install the Clarity tool, it will provide you better features to give proper data about the visitors. It provides heatmaps, session recordings, and behavioural analytics to help you gain deeper insights into the way your site visitors behave, and it integrates with Google Analytics and is compliant with both GDPR and CCPA.
Here are some features that you will get with the Clarity tool.
- Heatmaps – Track user interactions, such as clicks and scrolls, heatmap tracking generate a graphical representation of data which is known as a heatmap. A heatmap can show where visitors are clicking, as well as how far down they are scrolling on the webpage.
- Session Recording – It captures mouse movement, clicks, taps, scrolling, and keyboard strokes in real-time. Session Replay allows websites owner to gain insights into how users behave on their website, helping them to identify issues, optimize user experience, and improve conversion rates.
- ML Insights – ML Insights based filters and recommendations that help you identify what content should be most important for you.
These are the three features of the tool that gives benefit to you as you will get detailed information of the user’s engagements, you can replay the sessions, and a dashboard to get the overall view of the users with some filters.
Pros of Microsoft Clarity:
- It’s easy to install
- Integrates with Google Analytics
- Data comparison
Install Microsoft Clarity Tool in WordPress
The process of installing the Clarity in your WordPress site is easy. First you need to sign up for clarity and then add the tracking snippet to your website.
Steps to Sign up with Microsoft Clarity:
- First of all, visit the official website of Microsoft Clarity
- Once you visit the site, click on Get Started button which is at the top-right corner.
- Here, you will need Microsoft, Facebook, or Google account to Sign up.
- Once you Sign up and visit the site, you will see the dashboard of clarity with a pop-up for adding a new project.
- Here, enter the project name. (You can also use the name of your site.)
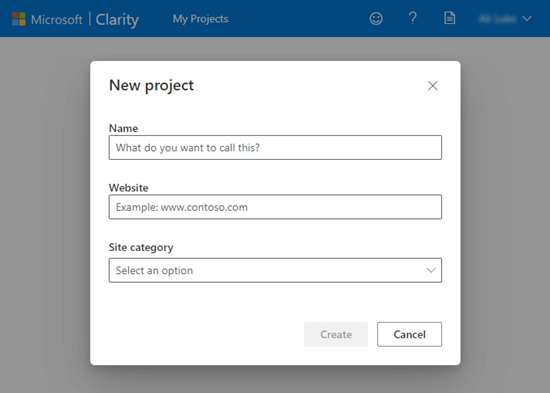
- Type in the URL of your site and select the category
- After you are done with creating a new project, it will be listed in the dashboard.
- To see the tracking code that will be needed to add to your site, click on the dashboard.
With these steps, you have now successfully signed up on the Microsoft Clarity Analytics account. Now, you can install it for other use.
Steps to Setup the Clarity with Google Analytics:
- Select the project of your choice and click on the Setup button.
- Now you can install the tracking code for that you can use a third-party app or can add manually.
- Click on the Copy to Clipboard option
- If you are also having a Google Analytics account, then it can also be added to your project.
- In the name of your website section, paste the tracking code
- Now wait for two hours, after that your dashboard will be filled with the data of your visitors.
Add the Microsoft Clarity Tracking Code to the WordPress Site
The Clarity tracking code should be available on all pages on the WordPress site. So, here’s how you can add the code to the site:
-
-
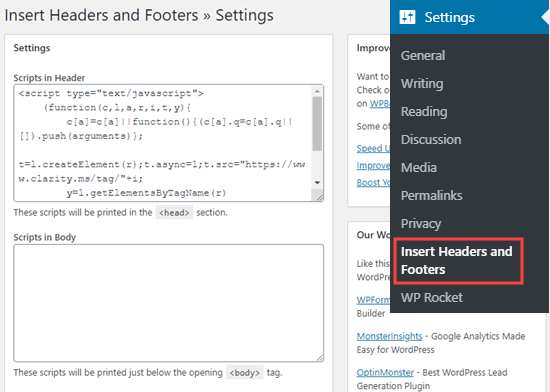
- First, install and activate the Insert Headers and Footers plugin.
- This plugin allows you to add any type of JS scripts in the header or footer from the dashboard of your WordPress.
- Now, copy and paste the Clarity tracking code in the box “Scripts in Header” section.
- Tap on the Save button at the bottom of your setting area.
- Now, the plugin will automatically add the code to all the pages of your website, to track the visitor activity.
-
Conclusion
This is it! Isn’t very easy to install Microsoft Clarity on your WordPress website? We have explained it in a step-by-step guide so that it will be easy for you to follow the steps. We hope this article was helpful to you.